Settings
Discover all the ways you can tailor and customize this site to meet your agency's unique needs.
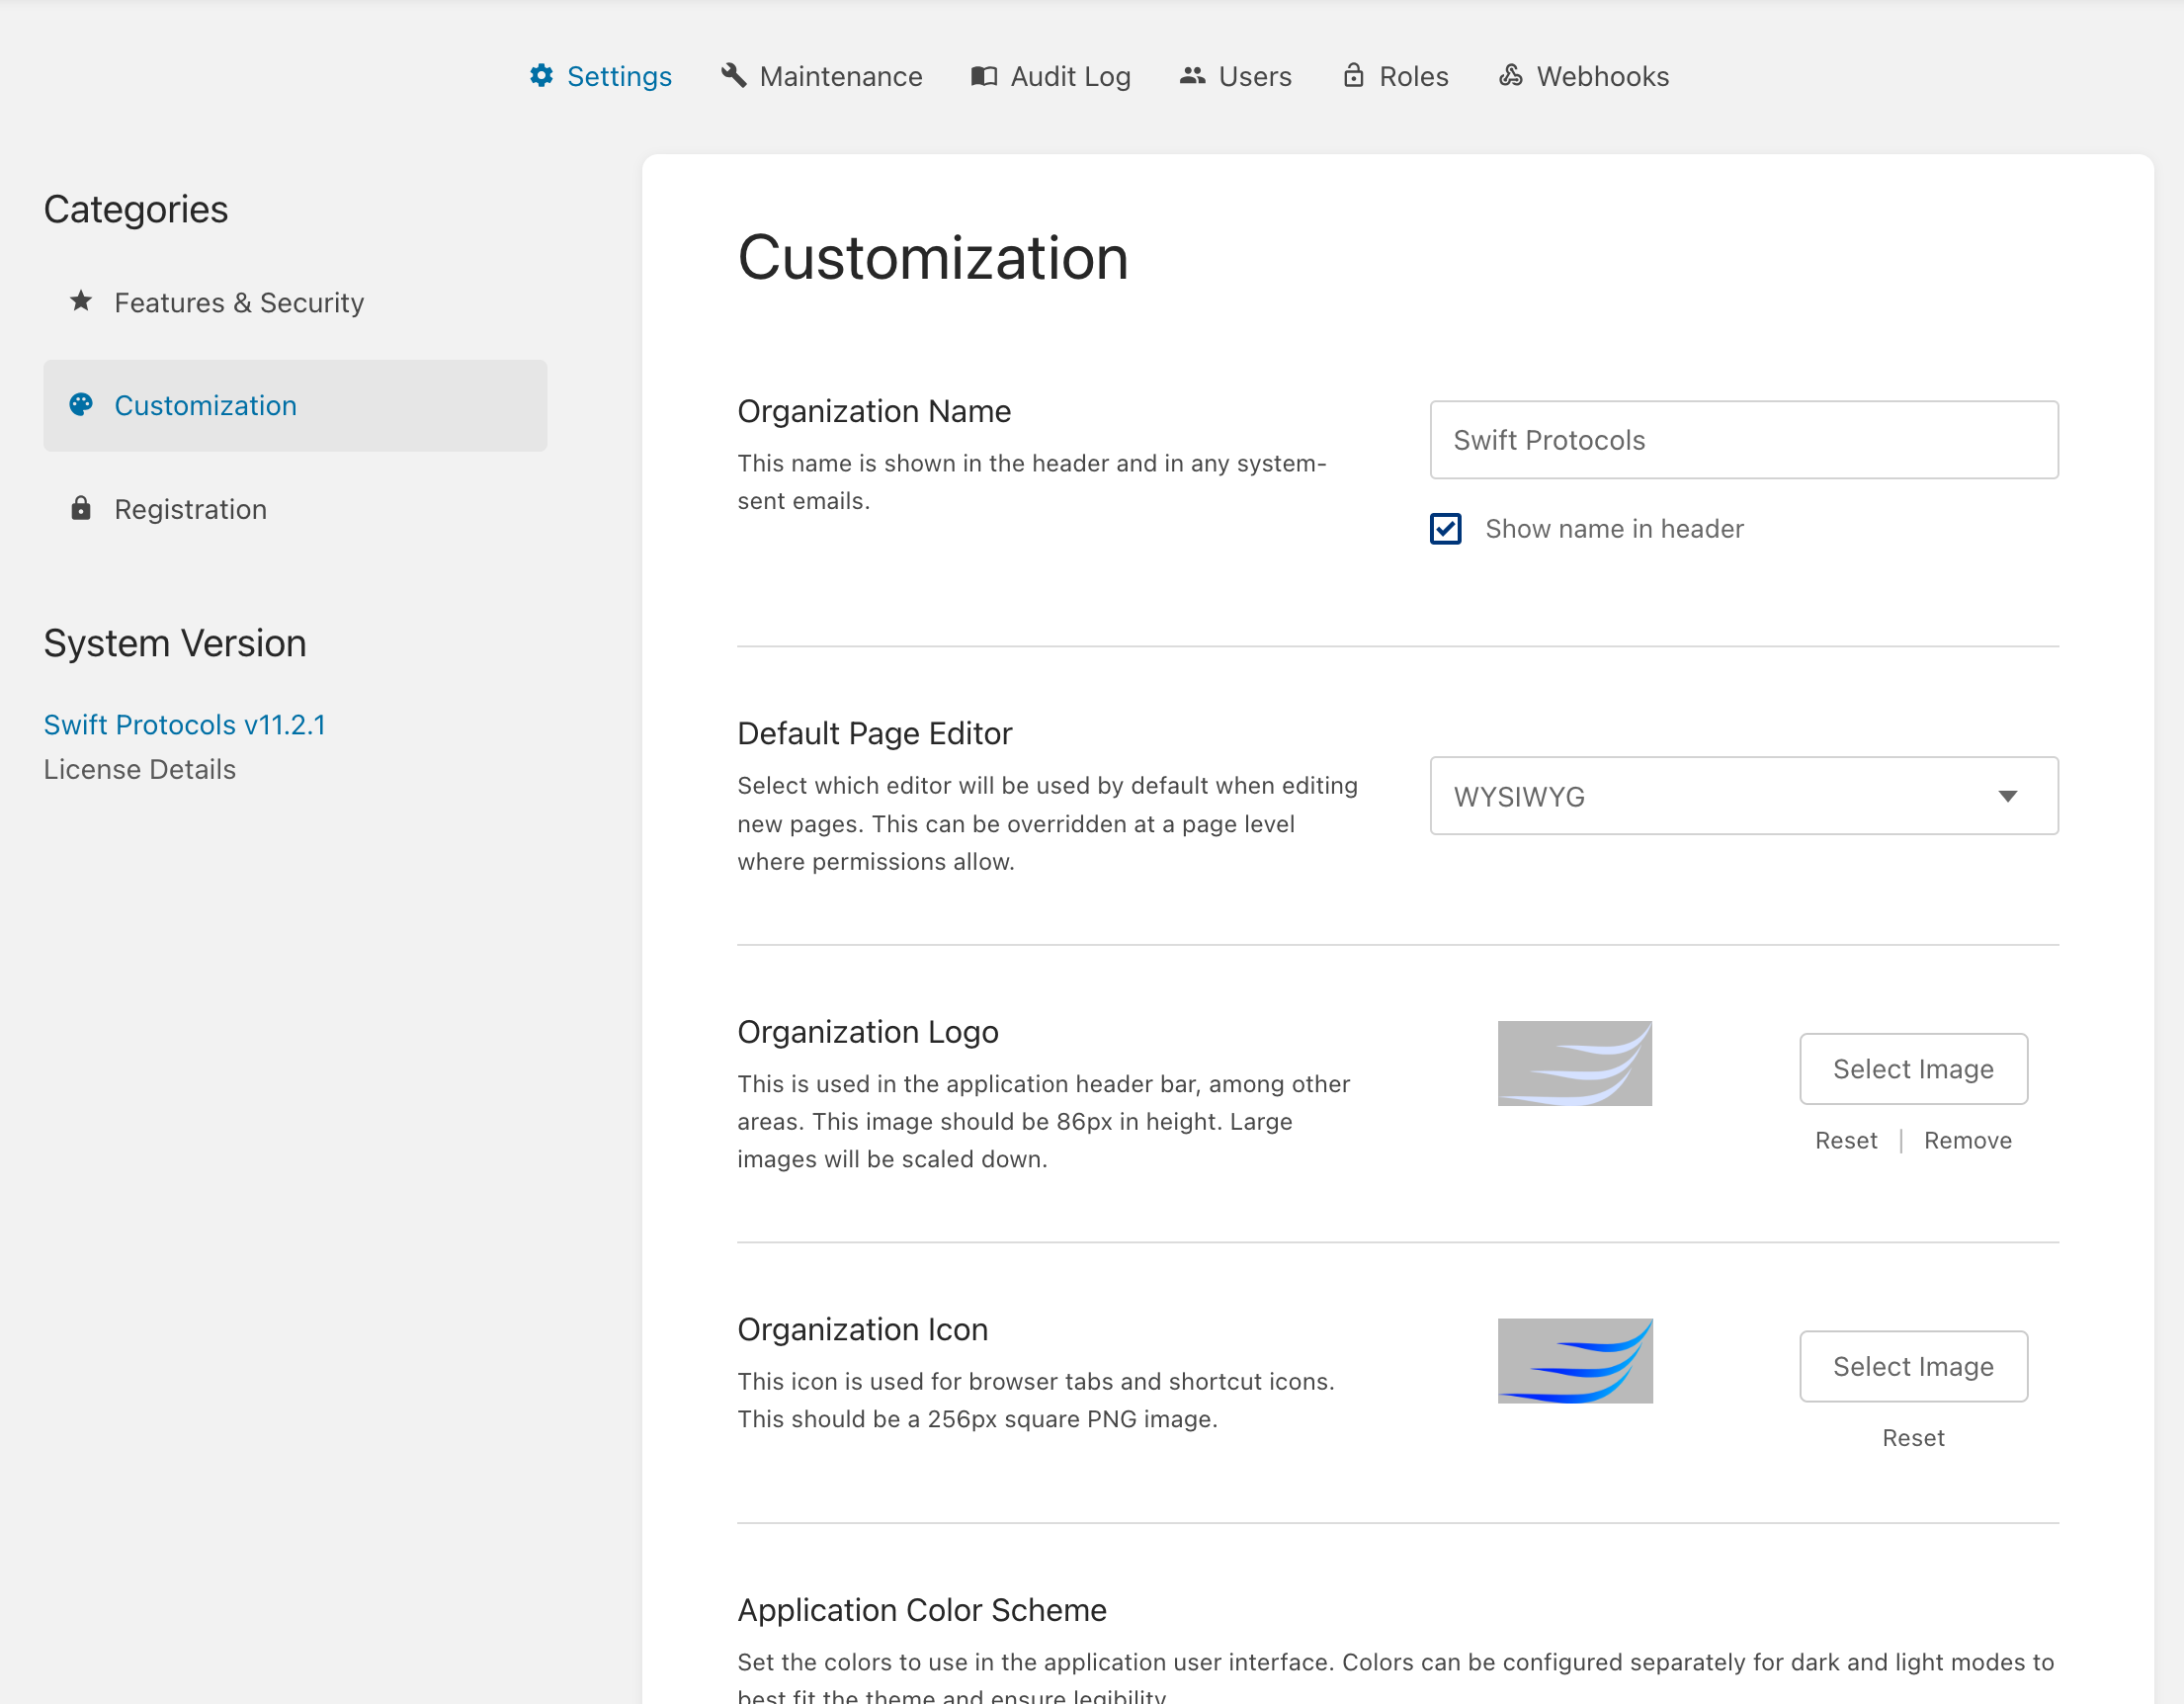
Customizations
This platform offers a range of customization options to tailor the website to your organization's branding and workflow needs. These settings can be accessed under Settings → Customizations, where you can:
-
Upload Your Logo: Personalize the site by adding your organization's logo for a branded experience.
-
Adjust Website Colors: Customize the website's appearance with distinct night and daytime color schemes to enhance usability and visual appeal.
-
Set a Default Landing Page: Decide what users see when they first access the site. Options include:
- Displaying a Delegation of Practice statement to ensure all users acknowledge it upon login.
- Directing users to the first page of your guidelines for immediate access to critical information.
User Access and Roles
This website offers a flexible role-based system to manage user access and permissions, ensuring that each individual has the appropriate level of interaction with your protocols. Here’s how you can customize roles to suit your organization's needs: Under Settings -> Roles:
-
Role-Based Access Control: Assign specific roles to users to define their access levels. For example, some organizations may restrict login access to users with permission to directly edit protocols, while others might enable broader access for viewing purposes only.
-
Integration with Single Sign-On (SSO): Seamlessly connect this platform with your organization's SSO provider, such as Okta, OAuth, or LDAP, to streamline authentication and user management.
-
Custom Role Creation: Tailor roles to match your organizational structure. For instance:
- Create a "Provider" role limited to viewing protocols without editing permissions.
- Designate roles like "Tactical Medic" or "911 Medic" for departments with distinct teams and specialized protocols.
-
Granular Access Control: Specify who can view or edit each protocol book. Assign roles to users and configure viewing or editing permissions directly within the platform, ensuring guidelines are accessible only to the appropriate personnel.

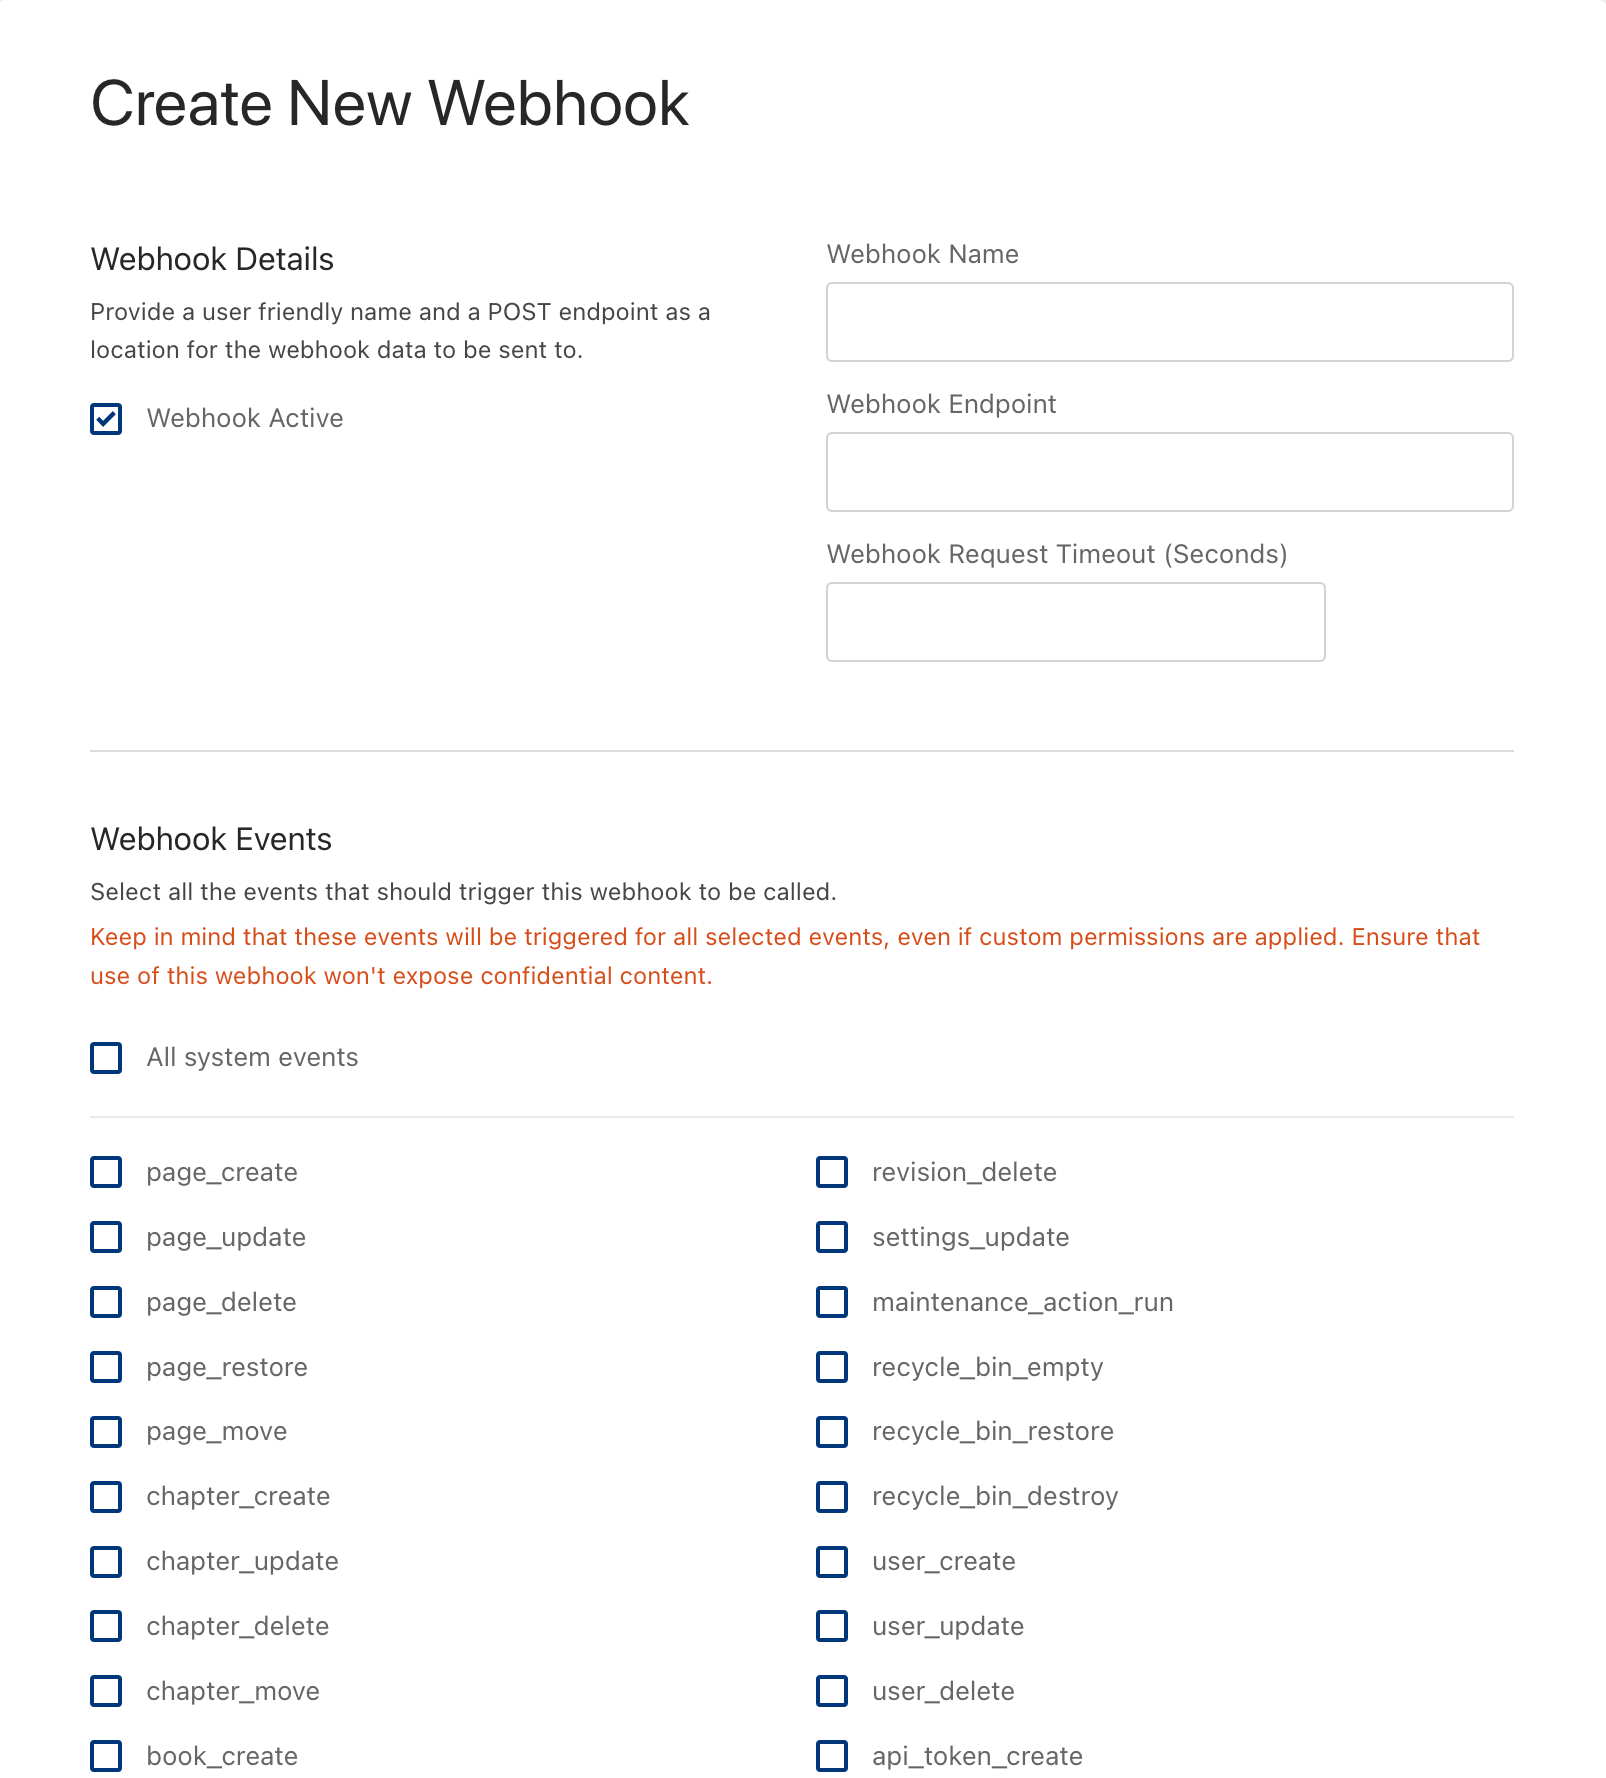
Webhooks
Webhooks provide a powerful way to integrate this platform with external systems by sending real-time data to external URLs when specific actions or events occur. This allows for seamless event-based communication with tools such as messaging services, notification platforms, or other external applications.
Features of Webhooks:
- Event Triggers: Webhooks activate whenever certain predefined actions occur within the system, such as a protocol being updated or a new user being added.
- Real-Time Data: They send immediate data payloads to the specified external URL, enabling instant updates and integration.
- Flexible Use Cases: Integrate with a variety of external systems, including:
- Messaging platforms (e.g., Slack, Microsoft Teams)
- Notification systems
- Custom dashboards or monitoring tools
How to Use Webhooks:
- Create a New Webhook:
- Navigate to the Webhooks section and select Create New Webhook.
- Provide a name and specify the external URL where the data should be sent.
- Configure Triggers:
- Choose which events or actions will activate the webhook.
- Examples include when a protocol is edited or a new role is assigned.
- Monitor and Manage Webhooks:
- Use the search and sort features to organize your webhooks.
- Easily identify and manage them by name or status.
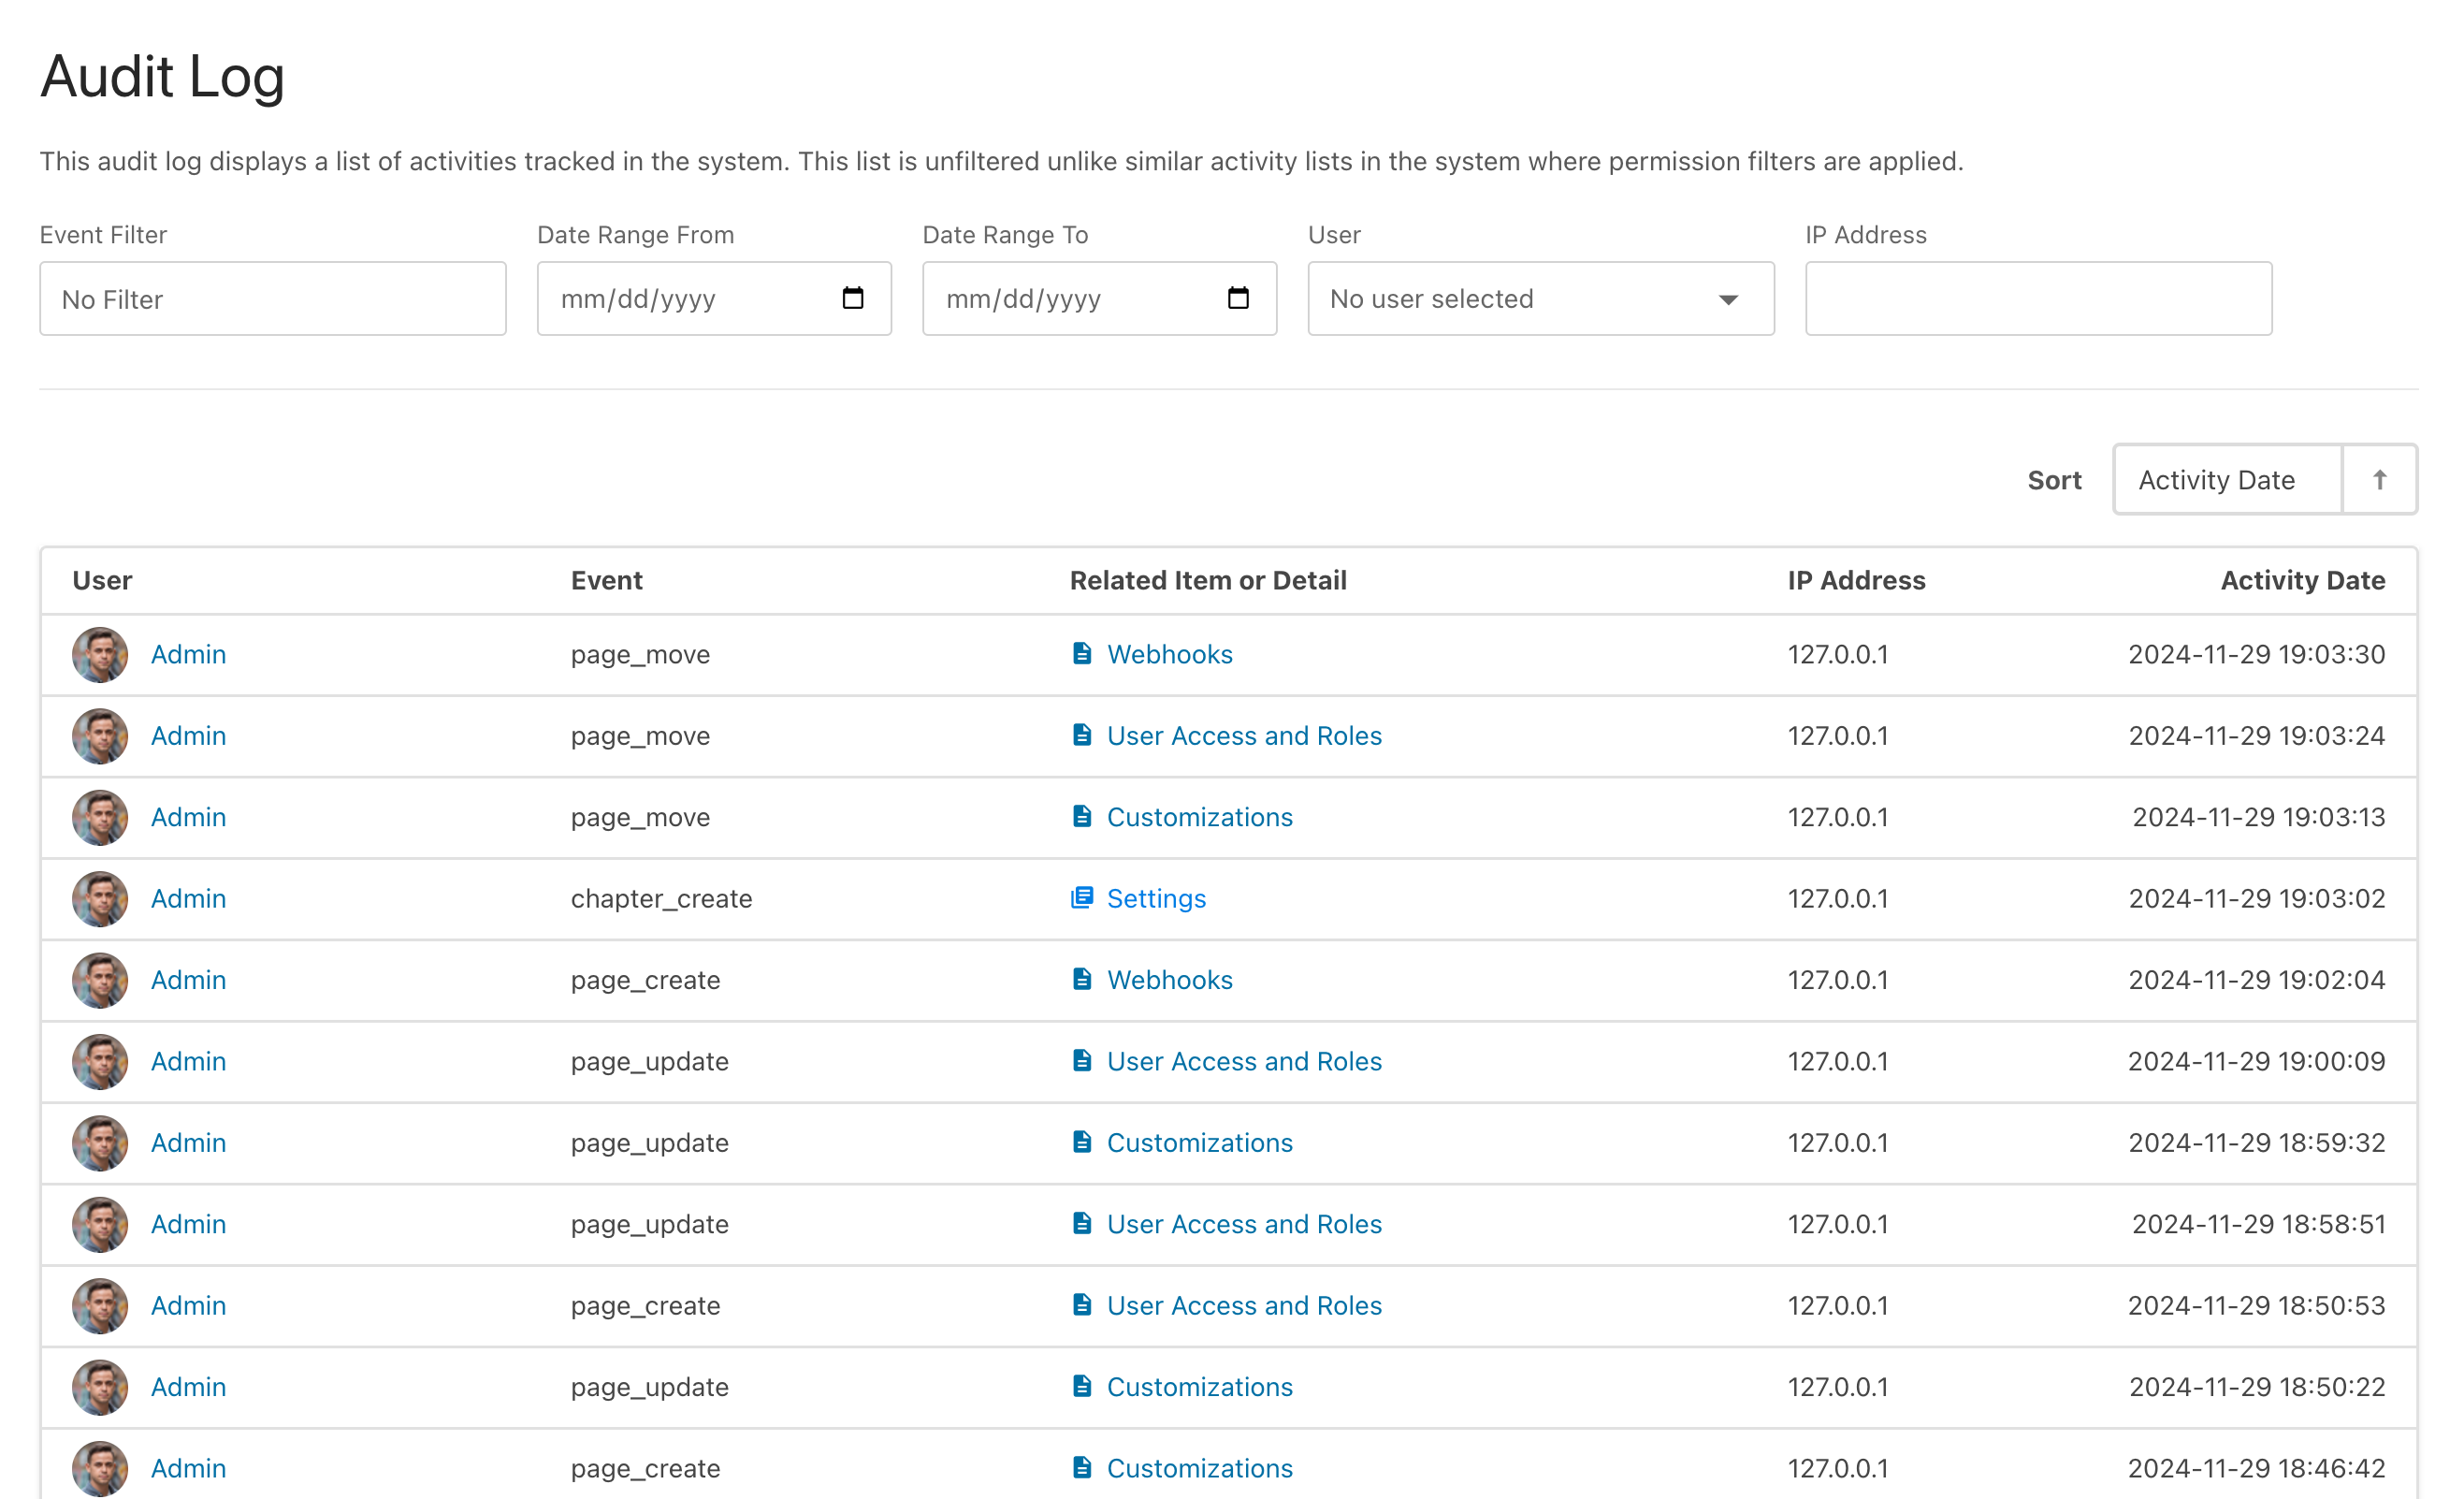
Audit Log
The Audit Log provides a comprehensive, unfiltered record of activities tracked within the system. Unlike other activity lists where access is restricted based on user permissions, this log displays all events for full transparency.
Features:
- Event Filters: Narrow down the log by applying filters such as:
- Date Range: Specify a "From" and "To" date for targeted searches.
- User: Filter activities by a specific user.
- IP Address: Locate actions originating from a particular IP address.
- Sorting Options: Organize the log by any of the available columns, including:
- Activity Date (default)
- User
- Event
- Related Item or Detail
- IP Address
Self Maintenance
The Maintenance section includes tools to help you manage, clean, and optimize your system, ensuring it operates efficiently and stays within your plan's data storage limits. The amount of data you can store depends on your subscription plan, so regular maintenance is essential to maximize available space. Here’s a breakdown of the available features:
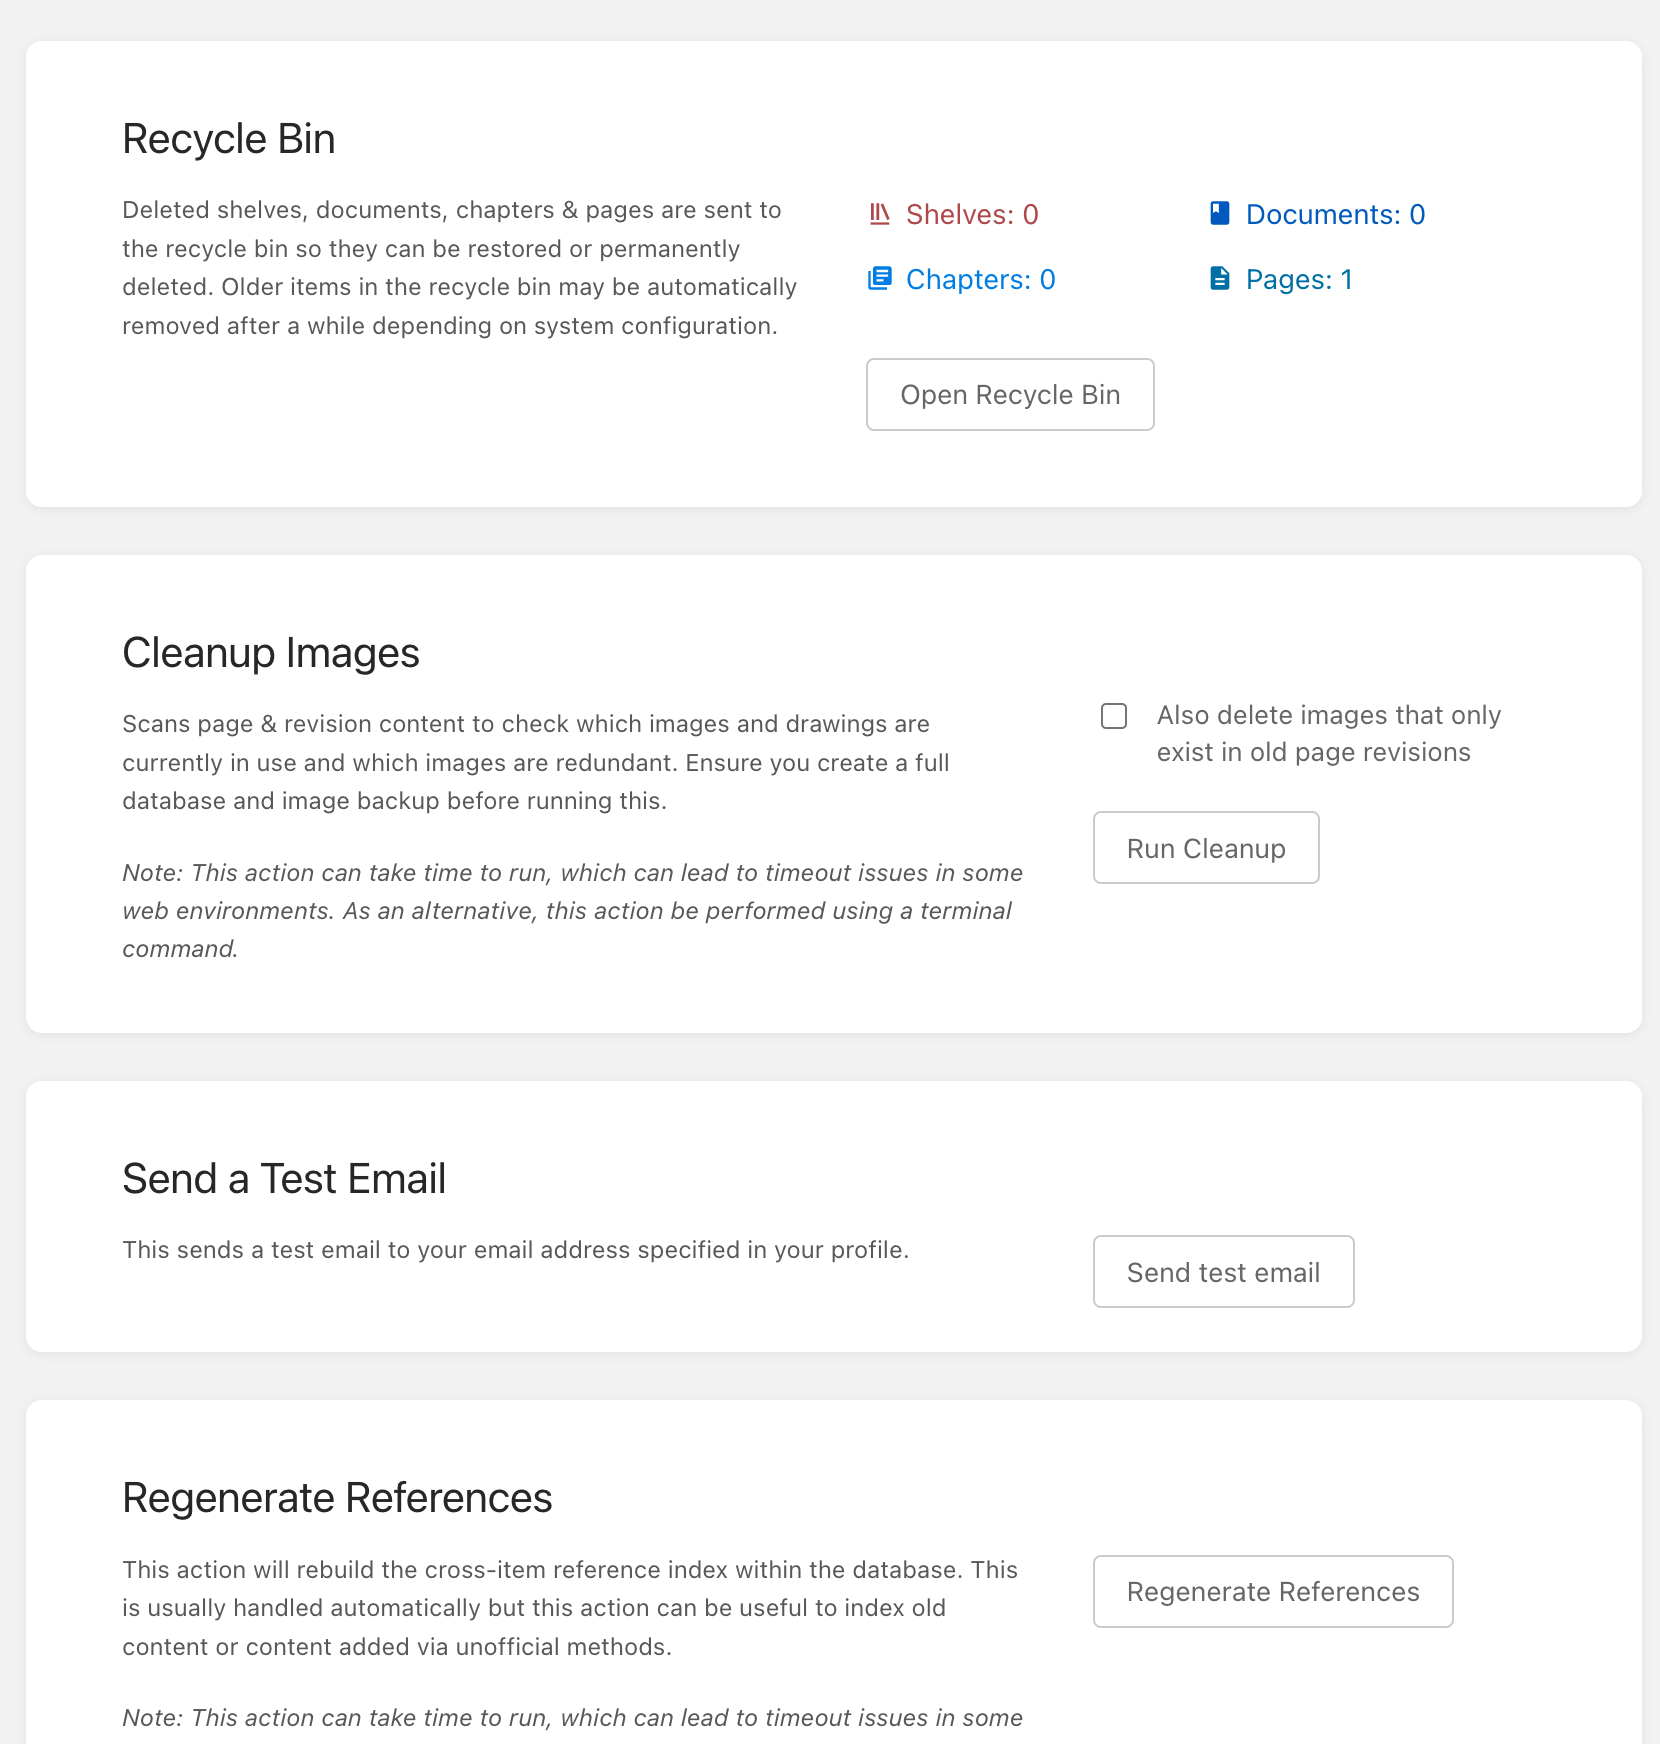
Recycle Bin
- Overview: Deleted shelves, documents, chapters, and pages are temporarily stored in the Recycle Bin. From here, items can be restored or permanently deleted.
- Automatic Removal: Older items may be automatically removed from the Recycle Bin based on system configuration.
- Action: Open the Recycle Bin to manage deleted items and free up storage space.
Cleanup Images
- Purpose: Scans page and revision content to identify unused or redundant images and drawings, helping you reclaim storage space by removing unnecessary files.
- Recommendation: Create a full database and image backup before running this action.
- Options:
- Option to delete images that exist only in old page revisions. It keeping accurate historical copies is important do not check this box. You can always export archived documents for offline storage.
- Performance Note: This process may take time, potentially leading to performance issues for your users. Do this during non-critical times.
- Action: Run the cleanup process to remove unused images and manage your storage effectively.
Send a Test Email
By default emails are sent from swiftprotocols.com. You can submit a ticket to change this to your own email provider.
- Purpose: Sends a test email to the email address specified in your profile.
- Action: Test email functionality to verify email system settings.
Regenerate References
- Purpose: Rebuilds the cross-item reference index within the database. This is typically handled automatically but can be useful for:
- Indexing older content.
- Updating content added via unofficial methods.
- Performance Note: Like image cleanup, this process can take time and might lead to timeout issues. It can also be run using a terminal command.
- Action: Trigger the reference regeneration process.